레이블이 Android-SDK-Tools인 게시물을 표시합니다. 모든 게시물 표시

12/28/2020

Android SDK Tools

1. UBOOT의 fastboot 명령 

  • Uboot의 fastboot 명령어 
=> fastboot --help
fastboot - run as a fastboot usb or udp device

Usage:
fastboot [-l addr] [-s size] usb <controller> | udp
        addr - address of buffer used during data transfers (0x98000000)
        size - size of buffer used during data transfers (0x19000000)

  • Uboot Fastboot Mode 설정 
fastboot usb 0을 설정 후 Window에서 USB Host에서 Board USB Gadget Download 생성됨 
=> fastboot 0
or 
=> fastboot usb 0


1.1 Android UBOOT CONFIG 관련설정 

Android Board에서 Uboot로 Booting 후 fastboot로 Android의 각 Partition을 Wrtie를 진행하면, 제대로 동작되지 않는데, 아래와 같이 Uboot 의 config를 수정  

CONFIG_FSL_FASTBOOT=y
CONFIG_FASTBOOT_LOCK=y  ## 이 부분제거해야 FAST_BOOT_LOCK이 되지 않는다.

UBOOT 관련내용 

Android Lock 관련내용 

A/B slot 문제


2.  Android SDK Tools 설치 및 실행 

Android SDK Tool은 아래 사이트에서 각 OS에 맞게 Download가 가능하다 

Android Studio가 설치가 되어있다면, SDK Manager에서 설치가능 


2.1 Window Android SDK Tools 


Uboot에서 Fastboot Mode 진입하면 아래와 같이 USB를 인식하여 Fastboot로 진행이 안됨

  • USB Download gadget


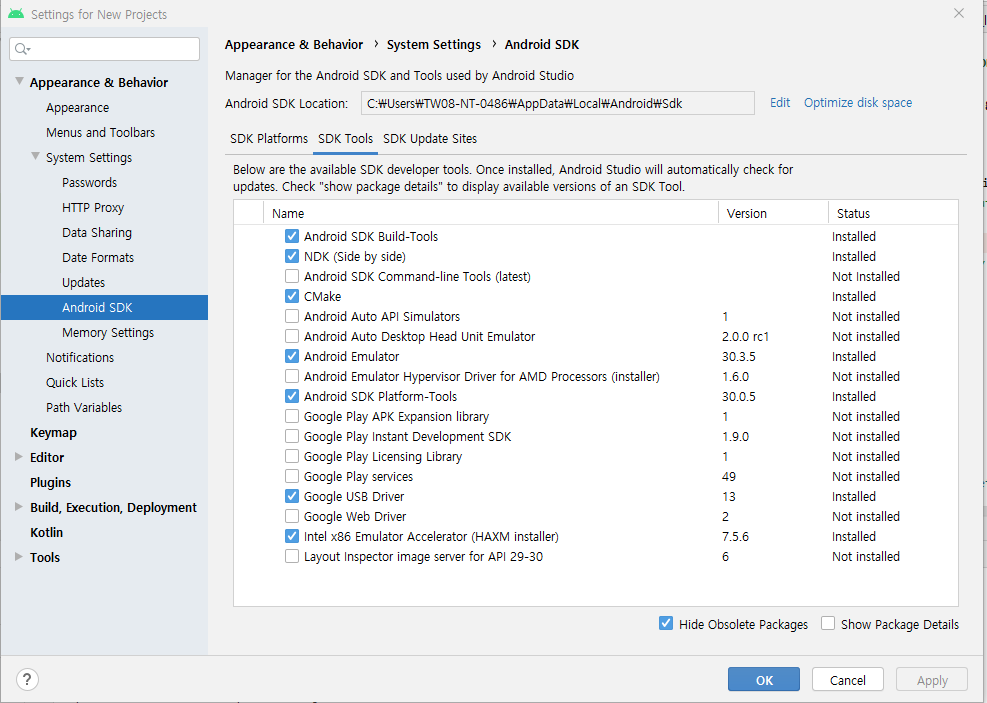
  • Android Studio->SDK Manager->SDK Tools 
  1. Android SDK Platform-Tools
  2. Google USB Driver 


상위와 같이 설치 했음에도 불구하구 Window 10에서 미인식됨 
하지만 이것을 Virtual Box에 Ubuntu 설치하여 이 USB Device를 Virtual Box로 넘기면, Virtual Box의 Ubuntu에서는 동작이 제대로 됨 

결론적으로 Window용 USB Driver를 별도 설치를 해야하며, WinUSB를 수정해야하는 것으로 파악된다. 
추후 이부분은 더 자세히 알아보도록하자. 


2.2 Linux Android SDK Tools 설치 및 실행 

Window에서 fastboot가 잘되지 않아 Virtual Box에 Linux 설치 후 테스트 진행했더니, 동작이 잘되어 아래와 같이 적어논다.


  • adb와 fastboot 설치 
$ sudo apt-get install android-tools-adb android-tools-fastboot 

  • 기본적인 fastboot 사용법 
$ fastboot --help
usage: fastboot [ <option> ] <command>

commands:
  update <filename>                        Reflash device from update.zip.
                                           Sets the flashed slot as active.
  flashall                                 Flash boot, system, vendor, and --
                                           if found -- recovery. If the device
                                           supports slots, the slot that has
                                           been flashed to is set as active.
                                           Secondary images may be flashed to
                                           an inactive slot.
  flash <partition> [ <filename> ]         Write a file to a flash partition.
  flashing lock                            Locks the device. Prevents flashing.
  flashing unlock                          Unlocks the device. Allows flashing
                                           any partition except
                                           bootloader-related partitions.
  flashing lock_critical                   Prevents flashing bootloader-related
                                           partitions.
  flashing unlock_critical                 Enables flashing bootloader-related
                                           partitions.
  flashing get_unlock_ability              Queries bootloader to see if the
                                           device is unlocked.
  flashing get_unlock_bootloader_nonce     Queries the bootloader to get the
                                           unlock nonce.
  flashing unlock_bootloader <request>     Issue unlock bootloader using request.
  flashing lock_bootloader                 Locks the bootloader to prevent
                                           bootloader version rollback.
  erase <partition>                        Erase a flash partition.
  format[:[<fs type="">][:[<size>]] <partition>
                                           Format a flash partition. Can
                                           override the fs type and/or size
                                           the bootloader reports.
  getvar <variable>                        Display a bootloader variable.
  set_active <slot>                        Sets the active slot. If slots are
                                           not supported, this does nothing.
  boot <kernel> [ <ramdisk> [ <second> ] ] Download and boot kernel.
  flash:raw <bootable-partition> <kernel> [ <ramdisk> [ <second> ] ]
                                           Create bootimage and flash it.
  devices [-l]                             List all connected devices [with
                                           device paths].
  continue                                 Continue with autoboot.
  reboot [bootloader|emergency]            Reboot device [into bootloader or emergency mode].
  reboot-bootloader                        Reboot device into bootloader.
  oem <parameter1> ... <parametern>        Executes oem specific command.
  stage <infile>                           Sends contents of <infile> to stage for
                                           the next command. Supported only on
                                           Android Things devices.
  get_staged <outfile>                     Receives data to <outfile> staged by the
                                           last command. Supported only on Android
                                           Things devices.
  help                                     Show this help message.

options:
  -w                                       Erase userdata and cache (and format
                                           if supported by partition type).
  -u                                       Do not erase partition before
                                           formatting.
  -s <specific device="">                     Specify a device. For USB, provide either
                                           a serial number or path to device port.
                                           For ethernet, provide an address in the
                                           form <protocol>:<hostname>[:port] where
                                           <protocol> is either tcp or udp.
  -c <cmdline>                             Override kernel commandline.
  -i <vendor id="">                           Specify a custom USB vendor id.
  -b, --base <base_addr>                   Specify a custom kernel base
                                           address (default: 0x10000000).
  --kernel-offset                          Specify a custom kernel offset.
                                           (default: 0x00008000)
  --ramdisk-offset                         Specify a custom ramdisk offset.
                                           (default: 0x01000000)
  --tags-offset                            Specify a custom tags offset.
                                           (default: 0x00000100)
  -n, --page-size <page size="">              Specify the nand page size
                                           (default: 2048).
  -S <size>[K|M|G]                         Automatically sparse files greater
                                           than 'size'. 0 to disable.
  --slot <slot>                            Specify slot name to be used if the
                                           device supports slots. All operations
                                           on partitions that support slots will
                                           be done on the slot specified.
                                           'all' can be given to refer to all slots.
                                           'other' can be given to refer to a
                                           non-current slot. If this flag is not
                                           used, slotted partitions will default
                                           to the current active slot.
  -a, --set-active[=<slot>]                Sets the active slot. If no slot is
                                           provided, this will default to the value
                                           given by --slot. If slots are not
                                           supported, this does nothing. This will
                                           run after all non-reboot commands.
  --skip-secondary                         Will not flash secondary slots when
                                           performing a flashall or update. This
                                           will preserve data on other slots.
  --skip-reboot                            Will not reboot the device when
                                           performing commands that normally
                                           trigger a reboot.
  --disable-verity                         Set the disable-verity flag in the
                                           the vbmeta image being flashed.
  --disable-verification                   Set the disable-verification flag in the vbmeta image being flashed.
  --wipe-and-use-fbe                       On devices which support it,
                                           erase userdata and cache, and
                                           enable file-based encryption
  --unbuffered                             Do not buffer input or output.
  --version                                Display version.
  -h, --help                               show this message.

2.1 Fastboot 실행 및 확인 

  • fastboot 준비사항 
우선 상위 Board의 Uboot에서 Fastboot Mode로 설정 후 Host에서 fastboot 명령어로 제어를 진행한다. 

  • fastboot device 정보 확인 
Board 의 Uboot에서 Fastboot 모드 일 경우 아래와 같이 Board 정보 확인가능 
$ sudo fastboot devices
051a700e828e4289	fastboot


  • fastboot flash unlock 진행 
나의 경우는 아래와 같이 fastboot flashing unlock 만 했더니 lock이 되었는데, 현재 각각의 차이점들은 알아가야 할 것 같다. 
$ sudo fastboot oem unlock

$ sudo fastboot flashing unlock

$ sudo fastboot flashing unlock_critical 


  • fastboot로 각 Partition write 진행 
각 Partition의 이름을 알아야 하면, 현재 a/b slot으로 구성되어있으므로, 각각의 Image를 write 후 reboot 진행 
$ sudo fastboot flash dtbo_a dtbo-imx8qxp-mipi.img

$ sudo fastboot flash boot_a boot.img

$ sudo fastboot reboot

관련내용참조 
  https://m.blog.naver.com/PostView.nhn?blogId=searphiel9&logNo=221367977833&proxyReferer=https:%2F%2Fwww.google.com%2F

12/24/2020

i.MX mfgtools/uuu

1. SoC의 I.MX Series 의 Window/Linux Tool

UUU(Universal Update Utility) 약어로 NXP사의 i.MX Series를 처음 Download할 때 필요한 Tool이며, fastboot와 연결해주는 역할까지 해주는 것으로 파악된다.
UUU는 기본적으로 libusb를 사용하며, 별도의 driver가 필요없으며, Window에서 i.MX Series 찾을 경우 USB HID Interface로 인식한다.


  • MFGTools/ UUU Download 
uuu program 과 uuu.pdf manual download 
  https://github.com/NXPmicro/mfgtools/releases

  • 기본사용법 아래링크에서 확인
상위 release에서 제공하는 uuu.pdf manual을 참고 


1.1 UUU기반의 기본 Batch 파일생성 

uuu를 download 했으면, 기본적으로 매번 uuu로 명령어를 실행하기가 귀찮기 때문에 batch file or shell script로 이를 만들어 필요한 부분만을 
본인이 정하고 사용한다. 

  • Burn_eMMC.bat 파일 예제
아래와 같이 쉽게 Window에서 쉽게 batch file or shell script를 만들어서 실행가능 
소스르 간단히 분석하면 setESC는 Window에서 색을 표시하기 위해서 넣었다. 
동작은 아래와 같이 동작한다.
  1. uuu -lsusb : uuu에 연결된 USB Device Vendor/Product ID 확인 
  2. uuu -b emmc_all u-boot.imx core-image-imx6sxsabresd.sdcard.bz2/*: u-boot.imx로 boot 후 core-image-imx6sxsabresd.sdcard.bz2 안에 file들을 write eMMC에 wirte
  3. uuu FB: ucmd setenv ethaddr 26:E1:2C:C4:C7:C6 : uuu script로 uboot에게 명령어 전달
  4. uuu FB: ucmd setenv eth1addr c2:42:5a:9f:cd:09 : 상동
  5. uuu FB: ucmd saveenv: 상동 (uboot의 정보 저장)

@ECHO OFF
TITLE Jeonghun's i.MX6 Burn_eMMC.bat
rem  
rem  * Author:  Jeonghun Lee
rem  * Description: 
rem    - This batch file is used for burning a Image into eMMC
rem    
setlocal
call :setESC
echo %ESC%[1;31m 
ECHO ------------------------------------------------------------------------------------------------------
ECHO ---------------------------      CAUTION           ---------------------------------------------------
ECHO ------------------------------------------------------------------------------------------------------
echo %ESC%[0m
ECHO Ready to burn an image on eMMC in iMX6 board 
ECHO Please check your bootmode or usb connection on your board if not work properly
echo %ESC%[1;31m
ECHO *** Please check "Connected Known USB devices" below
ECHO.     
ECHO     Chip          Vid         Pid
ECHO     -------------------------------
ECHO                  0x0525    0xA4A5 
ECHO      MX6SX       0x15A2    0x0071 
echo %ESC%[0m
ECHO.
uuu -lsusb
ECHO.  
echo %ESC%[1;31m
ECHO *** Please check "Success 1" and "Done" below after writing the Image  
echo %ESC%[0m
ECHO.   
uuu -b emmc_all u-boot.imx core-image-imx6sxsabresd.sdcard.bz2/*
ECHO.  
ECHO.  
ECHO.
echo %ESC%[1;31m
ECHO *** Please check "Okay" below after sending information into Uboot
echo %ESC%[0m
ECHO.
ECHO.
uuu FB: ucmd setenv ethaddr 26:E1:2C:C4:C7:C6
ECHO.
uuu FB: ucmd setenv eth1addr c2:42:5a:9f:cd:09
ECHO.
uuu FB: ucmd saveenv
echo %ESC%[1;31m 
ECHO ------------------------------------------------------------------------------------------------------
ECHO ----------------------------------   END        ------------------------------------------------------
ECHO ------------------------------------------------------------------------------------------------------
ECHO *** Please close your window
echo %ESC%[0m
PAUSE
:setESC
for /F "tokens=1,2 delims=#" %%a in ('"prompt #$H#$E# & echo on & for %%b in (1) do rem"') do (
  set ESC=%%b
  exit /B 0
)
exit /B 0

1.2 UUU Script 기반의 Batch 파일생성

상위기능은 기본적인 기능만을 사용하는 것으로, 좀 더 복잡하게 사용하고자 하면, uuu 내부 script를 연동하여 이를 batch file로 생성하여 만들어 사용하자. 

  • UUU Script (List) 관련내용(필독) 
  1. SDPS: Stream download 로  MX8QXPB0 이후 버전만 가능
  2. SDP:  iMX6/iMX7 HID download protocol로 SDPS로 동일기능이지만 HID로 download
  3. FB: Fastboot protocol 이용 
나머지 내용은 아래 링크 참조 

Linux Image는 간단하게 하나의 Image로 생성해서 만들어서 구우면 되지만, Android의 경우, 각 Partition을 만들어서 Write해야 하므로 
조금 복잡하므로 UUU list (Script)를 만들어서 실행해어야 한다. 

이전에 사용했던 batch file이 Linux Image이라고 생각하면 되겠다. 

  • uuu-list.txt 생성 (uuu script)
아래의 예제는 i.MX8QXP부터 가능하며, 동작방식은 u-boot를 booting 후 아래의 uboot command들을 직접 실행을 하는 것이다.
uuu_version 1.3.74 
SDPS: boot -f u-boot-imx8qxp-mek-c0-uuu.imx
FB: ucmd setenv fastboot_dev mmc 
FB: ucmd setenv mmcdev 0 
FB: ucmd mmc dev 0 
FB: ucmd mmc dev 0 0 
FB: ucmd mmc erase 0x2000 0x10 
FB: ucmd mmc partconf 0 1 1 1 
FB[-t 600000]: flash bootloader0 u-boot-imx8qxp-c0.imx
FB[-t 600000]: flash gpt partition-table-7GB.img
FB: ucmd setenv fastboot_dev sata 
FB: ucmd setenv fastboot_dev mmc 
FB[-t 600000]: flash dtbo_a dtbo-imx8qxp-mipi.img
FB[-t 600000]: flash boot_a boot.img
FB[-t 600000]: flash vbmeta_a vbmeta-imx8qxp-mipi.img
FB[-t 600000]: flash super super.img
FB[-t 600000]: erase misc
FB[-t 600000]: erase presistdata
FB[-t 600000]: erase fbmisc
FB[-t 600000]: erase metadata
FB: set_active a
FB[-t 600000]: erase userdata
FB: done 

상위 동작은 board에 u-boot-imx8qxp-mek-c0-uuu.imx booting 후 UUU가 동작한 후 ucmd로 별도의 u-boot-imx8qxp-c0.imx Write 진행한다. 
  1. u-boot-imx8qxp-mek-c0-uuu.imx : UBOOT Config UUU 지원
  2. u-boot-imx8qxp-c0.imx : UBOOT Config UUU 미지원
두개의 uboot를 사용이유는 보안문제로 이기 때문인것으로 파악되며, 외부에서 함부로 bootloader를 접근못하게 하는 것이다. 
또한 이 문제로 Android의 경우 u-boot-imx8qxp-mek-c0-uuu.imx write를 진행을 하지만 실제 bootloader는 u-boot-imx8qxp-c0.imx 기반으로 동작된다. 

이 문제로 인하여 uuu로는 단일 Partition write가 힘들지만, Android 소스를 변경했을 경우 빌드 진행 후 vbmeta 정보가 변경되어 (Partition의 hash 값이 변경)
단일 Partition write가 uuu로는 불가능하다. 

하지만 Android 전체빌드 후 전체 Partition Write 상위와 같이 가능하다. 


마지막에 a/b slot의 설정의 a 영역으로 설정진행 (fastboot 기능)
  1. SDPS: Stream download after MX8QXPB0
  2. SDP:  iMX6/iMX7 HID download protocol.
  3. FB[-t timeout]:\Fastboot: android fastboot protocol. unit of timeout is ms
  4. FBK: community with kernel with fastboot protocol. DO NOT compatible with fastboot tools.

mmc partconf 0 1 1 1 

  • 상위 uuu-list 적용 batch 파일
이전의 batch 파일과 거의 동일하지만, 대신에 uuu-list.txt를 만들어 직접 설정하도록함
@ECHO OFF
TITLE Jeonghun's i.MX6 Burn_eMMC.bat
rem  
rem  * Author:  Jeonghun Lee
rem  * Description: 
rem    - This batch file is used for burning a Image into eMMC
rem    
setlocal
call :setESC
echo %ESC%[1;31m 
ECHO ------------------------------------------------------------------------------------------------------
ECHO ---------------------------      CAUTION           ---------------------------------------------------
ECHO ------------------------------------------------------------------------------------------------------
echo %ESC%[0m
ECHO Ready to burn an image on eMMC in iMX6 board 
ECHO Please check your bootmode or usb connection on your board if not work properly
echo %ESC%[1;31m
ECHO *** Please check "Connected Known USB devices" below
ECHO.     
ECHO     Chip          Vid         Pid
ECHO     -------------------------------
ECHO                  0x0525    0xA4A5 
ECHO      MX6SX       0x15A2    0x0071 
echo %ESC%[0m
ECHO.
uuu -lsusb
ECHO.  
echo %ESC%[1;31m
ECHO *** Please check "Success 1" and "Done" below after writing the Image  
echo %ESC%[0m
ECHO.   
uuu  uuu-list.txt
ECHO.  
ECHO.  
ECHO.
echo %ESC%[1;31m
ECHO *** Please check "Okay" below after sending information into Uboot
echo %ESC%[0m
ECHO.
echo %ESC%[1;31m 
ECHO ------------------------------------------------------------------------------------------------------
ECHO ----------------------------------   END        ------------------------------------------------------
ECHO ------------------------------------------------------------------------------------------------------
ECHO *** Please close your window
echo %ESC%[0m
PAUSE
:setESC
for /F "tokens=1,2 delims=#" %%a in ('"prompt #$H#$E# & echo on & for %%b in (1) do rem"') do (
  set ESC=%%b
  exit /B 0
)
exit /B 0

2. i.MX 의 Android flashtool 예제 분석 

Android 용 uuu flash batch file인데, batch file로는 너무 좋은예제인 것 같아 아래와 같이 넣어 놓는다. 
사실 상위 uuu.list는 아래의 batch file의 결과를 수정하여 만들 것이므로, i.MX에서 제공하는 아래의 batch file을 사용할 필요가 없다.  
직접 본인이 만들어 사용하는 것이 편하다. 

동작원리는 최종결과물에 uuu.lst를 상위와 거의동일한 script 만들어가면서, 이때 파일의 심볼릭링크 link를 같이 이용한다.
나의 경우는 link 대신 직접 파일이름을 넣어 이전 uuu.list를 작성했다.  

최종동작원리는 uuu 와 uuu.lst를 같이 동작한 후 이를 삭제하도록 하는 구조이며 이부분만 파악하면된다. (463 Line)

  • uuu_imx_android_flash.bat

3/03/2014

Android SDK Tool 개발환경 설치

1. Download SDK Tool 및 설치  


아래의 사이트에서 좌측 Download의 VIEW ALL DOWNLOADS AND SIZES에 보면
ADT (Android Developer Tools) 와 SDK Tools이 있으며 각각 선택이 가능하다
Linux용 Window용 각각 종류별로 다 있다.
SDKTool 받던 ,ADT를 받던 선택을 하자.

  http://developer.android.com/sdk/index.html
  https://developer.android.com/studio/releases/sdk-tools

  • adt-bundle-windows-x86_64-20131030.zip
  • android-sdk_r23.0.2-windows.zip

기본구성        
  • SDK Manager.exe : SDK를 관리하는 Manager program으로 항상 최신으로 update가능하다. 
  •  sdk       :  개발툴이 존재하며, platform-tools 안에 
                       adbfastboot,  usb_driver 도 존재한다.
  •  eclipse  : eclipse  존재하며 이곳에서 개발가능 

     usb driver : sdk\extras\google\usb_driver


설치방법 ( 아래의 사이트에 설치방법, 자세히 나와있음)
  http://www.teamandroid.com/2012/07/30/how-to-set-up-adb-fastboot-with-android-sdk/


  http://dottech.org/21534/how-to-install-adb-and-fastboot-on-your-windows-computer-for-use-with-your-android-phone/

PATH 설정
  http://visu4l.tistory.com/391


2.  Android USB Driver  설정 및 확인


   설정 -> 개발자 옵션-> USB 디버깅  체크


1.1  Linux Server에서 USB Driver 설정 

  • USB 설정
$ sudo vi /etc/udev/rules.d/51-android.rules
    SUBSYSTEM=="usb", ATTR{idVendor}=="18d1", MODE="0666"

$ sudo chmod a+rx /etc/udev/rules.d/51-android.rules
$ sudo service udev restart   

  • Fastboot Driver 설정 (만약 위에 것이 안될 경우, 해보자)
$lsusb
    Bus 002 Device 059: ID 18d1:4e42 Google Inc. // Google 확인해야 한다고 한다.
$ sudo vi /etc/udev/rules.d/99-android.rules
    SUBSYSTEM=="usb", SYSFS{idVendor}=="18d1", MODE="0666", OWNER="jhlee" 

  //OWNER PC username을 사용
$ sudo service udev restart   
$ sudo fastboot devices // 확인 
 
  
자세한 내용은 아래의 사이트를 참조하자
  http://developer.android.com/tools/device.html
  https://github.com/red-root/PortingARMLinux/wiki/Fastboot-%EC%84%A4%EC%B9%98-%EB%B0%8F-%EC%82%AC%EC%9A%A9%EB%B2%95


1.2. Window  USB Driver 설정 

1.2.1   USB Driver 가 없을 경우.

  • Google USB Driver 
android_winusb.inf 포함 

OEM USB Driver 

  • OEM USB Driver 관련내용 
android_winusb.inf 수정대신에 직접 OEM USB Driver 설치 


  • 장치관리자 확인 

         장치관리자에서 잡힌 Android Device 등록정보->자세히->속성: 하드웨어ID   확인
             USB\VID_18D1&PID_0201&REV_9999&MI_01
             USB\VID_18D1&PID_0201&M1_01

  • SDK 의 android_winusb.inf 파일수정 

     SDK에서 제공하는 android_winusb.inf 파일을 이용하여 아래와 같이 수정해서
     USB Driver를 만들어 간단히 설치함 (장치관리자 재설치 가능)

     필요파일:

              sdk\extras\google\usb_driver 의 android_winusb.inf 파일

     아래부분은

     수정위치 :
 [Google.NTamd64]
; my
%SingleAdbInterface%        = USB_Install, USB\VID_18D1&PID_0201&MI_01
%CompositeAdbInterface%     = USB_Install, USB\VID_18D1&PID_0201&REV_9999&MI_01
%SingleBootLoaderInterface% = USB_Install, USB\VID_0BB4&PID_0FFF


      [Goolgle.NTx86]   : 32 bit  Window
      [Google.NTamd64] : 64bit Window

      SingleAdbInterface             : ADB Driver
      SingleBootLoaderInterface : Fastboot Driver

  http://acomyong.egloos.com/viewer/2966118

 
1.2.3   USB Driver가 발견이 안될 경우
         
  •      장치관리자 확인 
         장치관리자에서 잡힌 Android Device 등록정보->자세히  확인
             USB\VID_18D1&PID_0201&REV_9999&MI_01
             USB\VID_18D1&PID_0201&M1_01

  • adb_usb.ini 파일 수정 

      파일위치:
      C:\Users\username\.android\adb_usb.ini
       아래와 같이 Vendor ID만 넣어 주면 됩니다.

0x18D1


  • ADB restart
adb kill-server
adb devices


logcat -b all

4.   설치방법

ADB Driver 설정
  http://www.teamandroid.com/2012/07/30/how-to-set-up-adb-fastboot-with-android-sdk/2/


Fastboot Driver 설정
  http://www.teamandroid.com/2012/07/30/how-to-set-up-adb-fastboot-with-android-sdk/3/


  http://blog.naver.com/PostView.nhn?blogId=ncs10066&logNo=80182428314&categoryNo=58&parentCategoryNo=0&viewDate=&currentPage=1&postListTopCurrentPage=&userTopListO

  http://stackoverflow.com/questions/19830407/i-cannt-find-adb-usb-ini-file-in-android-folder

1/02/2014

Fastboot 사용 및 Linux에서 Image Control

1. Fastboot  기본설명 

처음에 Fastboot 사용법을 정확히 숙지하지 못해, 좀  당황했는데  이제 좀 알겠다.
uboot에서 fastboot 모드로 진입을 하여, 윈도우에서 연결하여 이를 사용하는 방식이다.
그래서 uboot에서 fastboot를 제공하지 않으면 이를 실행할 수가 없다.

핸드폰 일 경우, 볼륨다운+전원버튼을 기기가 켜질때까지 누르고 있으면, 화면이
바뀐다고한다. 이를 bootloader모드라고 하며 이때 window에서 역시 접근이 가능하다.


2. U-BOOT에서 FASTBOOT MODE 설정 ( bootloader 모드)

아래와 같이 uboot에서 fastboot command를 입력 후 fastboot 모드로 진입이 되며,
Window의 fastboot 연결을 기다린다.

U-Boot 2010.12-svn (Nov 28 2012 - 11:35:59) for ODROID4412


CPU: S5PC220 [Samsung SOC on SMP Platform Base on ARM CortexA9]
APLL = 1000MHz, MPLL = 880MHz
DRAM:  2 GiB

PMIC VERSION : 0x00, CHIP REV : 2

BL1 version: N/A (TrustZone Enabled BSP)


Checking Boot Mode ... SDMMC
MMC Device 0: 7695 MB
MMC Device 1 not found
*** Warning - using default environment

ModeKey Check... run normal_boot 
Net:   No ethernet found.
Hit any key to stop autoboot:  0 
ODROID4412 # 
ODROID4412 # fastboot
[Partition table on MoviNAND]
ptn 0 name='fwbl1' start=0x0 len=N/A (use hard-coded info. (cmd: movi))
ptn 1 name='bl2' start=N/A len=N/A (use hard-coded info. (cmd: movi))
ptn 2 name='bootloader' start=N/A len=N/A (use hard-coded info. (cmd: movi))
ptn 3 name='tzsw' start=N/A len=N/A (use hard-coded info. (cmd: movi))
ptn 4 name='kernel' start=N/A len=N/A (use hard-coded info. (cmd: movi))
ptn 5 name='ramdisk' start=N/A len=0x1000000(~16384KB) (use hard-coded info. (cmd: movi))
ptn 6 name='system' start=0x43D2200 len=0x380BDE00(~918263KB) 
ptn 7 name='userdata' start=0x3C490000 len=0x400D9000(~1049444KB) 
ptn 8 name='cache' start=0x7C569000 len=0x801B200(~131180KB) 
ptn 9 name='fat' start=0x84584200 len=0x4C87BE00(~1253871KB) 
Insert a OTG cable into the connector!


Fastboot 기본사용법
https://github.com/red-root/PortingARMLinux/wiki/Fastboot-%EC%84%A4%EC%B9%98-%EB%B0%8F-%EC%82%AC%EC%9A%A9%EB%B2%95
http://www.jinhaesi.com/bbs/skin/ggambo7002_board/print.php?id=jaewonquestion&no=62


3. Fastboot 기본 사용법

Android Device의 Flash를 Erase,Write 및 Reboot  조절이 가능하다.
  • fastboot --help  기본사용법

fastboot 

command :

  • flash [ ] :  해당파일을 partition에 write한다.
  • erase                      : partition 을 지운다.
  • format                     : partition을 format 한다.
  • boot [ ]     : 해당 kernel와 ramdisk를 download한 후 boot한다.  
  • devices                                    :  연결된 device list를 보여준다.

options:
  •  -w :   erase userdata and cache

기본예제들
 
기본이미지 write

   fastboot flash kernel arch/arm/boot/zIamge
   fastboot flash kernel arch/arm/boot/zImage
   fastboot flash ramdisk out/target/product/odroidx2/ramdisk-uboot.img
   fastboot flash system out/target/product/odroidx2/system.img


Ref.  (omap에서 사용하는 fastboot )
http://omappedia.org/wiki/Android_eMMC_Booting


Ref.
http://com.odroid.com/sigong/nf_board/nboard_view.php?brd_id=odroidx&kind=&bid=1564


4. Linux 에서 Image Control 


dd 명령어 사용

  • if         = input file
  • of        = output file 
  • iflag     = input flag, direct 와 dsync 있다.
  • oflag    = output flag 
  • seek    =  output file 시작 위치 기준으로 block 단위로 넘어간다. 
  • skip     =  input file 시작 위치   기준으로 block 단위로 넘어간다.   
  • bs       =  한번에 처리할 bytes, 이를 block   ( ibs , obs 개별 설정도 가능)
  • count  =  이를 몇번 처리할 총 횟수    ( bs * count  용량계산 512x32 =  16k bytes)
                   
# sudo dd iflag=dsync oflag=dsync if=./u-boot-bl1.bin of=/dev/sdb seek=1  
  // u-boot-bl1.bin 파일을 /dev/sdb 에 1부터 write

# sudo dd iflag=dsync oflag=dsync if=./u-boot.bin of=/dev/sdb seek=33 
  // u-boot.bin 파일을 /dev/sdb에 33block부터 write 

# sudo dd iflag=dsync oflag=dsync if=/dev/zero of=/dev/sdb bs=512 count=32 
 //  /dev/sdb를 16k (512 x 32 ) 만큼 지운다.                

# dd iflag=dsync oflag=dsync if=./dump-img.img of=/dev/sde bs=512 count=1024
 //512kbyt 만큼 /dev/sde에 dump-img.img write

# dd iflag=dsync oflag=dsync of=./dump-img.img if=/dev/sde bs=512 count=1024 
 //512kbyt 만큼 /dev/sde에 dump-img.img read

# dd if=/dev/mtd2 of=./default_env.img 
 // 기본적인 read

http://www.thomas-krenn.com/en/wiki/Linux_I/O_Performance_Tests_using_dd

http://www.mapoo.net/entry/dd-%EC%98%88%EB%A5%BC-%ED%86%B5%ED%95%9C-%EC%98%B5%EC%85%98%EC%9D%98-%EC%9D%98%EB%AF%B8

http://com.odroid.com/sigong/nf_board/nboard_view.php?brd_id=odroidq2&kind=&bid=2482


기타 명령어

  #  eraseall /dev/mtd3
  #  hexdump -C default_env.img | more


http://forum.falinux.com/zbxe/index.php?document_srl=561988&mid=lecture_tip

http://com.odroid.com/sigong/nf_board/nboard_view.php?brd_id=odroida&kind=9&bid=563

http://blog.naver.com/PostView.nhn?blogId=dong880510&logNo=140162582089
http://www.vim.org/vimscriptlinks.php